Making Memories: A Fun DIY project

I love books! As a kid I loved workbooks and fill in the blanks. I'm a nerd for paper. And I still am. I ran across this pin awhile back and thought it was such a wonderful idea. Basically this blogger came up with 30 questions of things she thought her kids should know about her. What a fun idea! And the more I thought about, the easier I decided it would be to make it into a fun book! I used different fonts I had downloaded on my computer and typed out each question. Then I printed them out on card stock and doubled sided it. I made a cover page by printing a fun peice of digital paper and then feeding it back through the printer to print our names right on top. I paper clipped it all together and took it down to Staples and had them do a spiral bind on it. It was a fun and cheap project that turned into a keepsake! I keep thinking I need to print more of these books for some of the mamas and daddies I know. I know Mer will enjoy reading this later on.


I cannot find the site I got these digital papers from :( 


As you can see I haven't finished my book yet.


I love to use pretty colored pens to fill it out. 

This general idea of a book of questions is a great idea for kids as well! So many possibilities!

xx

Jamie 

Maps! A fun DIY

I love maps! Like love love them! I have no idea how I came about this relatively newfound love but they fascinate me and I feel like just looking at them opens doors. I've been looking at some watercolor style maps on Zulily for months. But the smallest version is $30, and then it still needs a frame. And while that isn't a great deal of money, it was more than I wanted to pay. Two weeks ago I walked into Walmart and practically squealed! They had the word version of the watercolor maps for $5 as posters! Yay yay yay!! I scooped up both the US and world version and headed home to figure out how on earth to make a frame. After some Googling, I found a great site, that I can no longer find, and used it as a general guide. I measured the poster and then headed for Sutherlands (it's kinda like Lowe's). I bought three pieces of 8 foot lattice that is about 1.75 inches wide. It's a thinner wood, only 1/4 inch thick, which was perfect, as everything else seemed too big and bulky. I had the store cut them down about a quarter inch shorter than the poster (I suggest doing at least 3/4 inch smaller to avoid some extra steps).

We assembled the wood into frames on our patio and glued them together with wood glue. 


Toddlers can help too, ya know! We left the frames outside for a few hours so the glue would set. 


Nice feet honey! We used some wood joiners but I don't think they did much. 


Once they were dry I painted them a lovely and bright blue color. Again I left them outside for a few hours to get good and dry. It was about this time I realized that my poster and frame were just too close in size, I'd need something else to attach it. I bought 4 pieces of poster board, and used my dot runner from my scrapbook supplies to joint the pieces together so that they fit completely behind the frame, but were big enough to attach it to the frame. Then I used my dot runner to attach the poster to the poster board. 


Now all that's left is to attach it to the frame. I used packing tape all the way around the poster to secure it to the frame, as the staples in the staple gun were too long. I have a long shelf in my living room where I wanted to put them so I didn't use any hooks on the back or anything. A picture frame hanger would do the trick if you wanted to hang it. I slid these up on the shelf and have been admiring their beauty ever since. 


I'm thrilled with how these turned out. It was an inexpensive project that has offered lots of visual interest. The frames are light weight and it's so easy to change up the color. What have you been up to lately to change up your home décor?

xx

Jamie 

Follow Friday: Mish Mash

TGIF! Another week is in the books and that means it's time for another round of follow Friday! When I was a kiddo, we had the most lovely substitute teacher, Mrs. Wooderson. As I got older, I learned that she was quite the crafter and scrapbooker. One weekend I went garage saling and stumbled upon hers, it was scrapbook heaven! I bought a huge basket of paper and stickers and little kits that I have used here and there and held onto for dear life because simply having those in my house makes me happy. About a year ago I was surfing Pinterest for some Project Life inspiration and found the most beautiful blog, Mish Mash, and it was hers! I could not have been more thrilled. As luck would have it I haven't run into her in Walmart since then to tell her what a huge fan I am but I'm sure I will soon. Until then I'll keep following her Instagram and her blog for inspiration and the most beautiful photos.

http://michellewooderson.blogspot.com/


Her blog is so fun to read and her Project Life eye candy always gets me motivated to get back to documenting our memories. This post about canning is really making me eager to try my hand at it. Go visit Michelle over at Mish Mash and tell her I said hi!

xx

Jamie 

Happy Birthday Book

Birthdays are the specialist of days in our family (and most others). The kids always get a fun themed party, the adults usually have a low key and enjoyable birthday dinner. With birthdays come gifts and with gifts come cards. I am so sentimental and I can't bear to part with cards. I keep them all. My mom has been keeping them for me since I was a kid. I have a big plastic tote full of cards. It is so special to go through and read the cards from my first holidays, especially the cards from my Gramma Ann who is no longer with us. I don't read them often, as they always result in tears and overwhelming emotions, but I treasure them. The Grents are big fans of cards and we usually get several at our birthdays. Typically these consist of one sentimental one and a few funny (read inappropriate) ones. I decided that instead of Mer having a bunch of birthday cards from us each year, I would make a book where we could write her a message and friends and family could do so as well. I hopped on Blurb and set it up so each page was a solid color, with each ages set of pages a different color, so all the pages for her first  birthday are the same color and so on.


For each birthday I have a 2 page spread which notes which birthday it is, and this is where I'll put a few birthday pictures (eventually haha!)


Next is a message from Mom and Dad.


Followed by a place for messages from friends and family. We set this out at each birthday party.


I included two more blank pages after this for more messages or photos.


Here are our messages from her second birthday: 


This book has pages for her all through her 18th birthday. I made this on Blurb and I'm very happy with it, but it was pretty pricey. With some of the recent changes on Snapfish, you can easily make this on there and get it when they have a half off sale for much cheaper. This would make a great gift! 

xx

Jamie 

Lasagna

When I grew up, my mom made some of the absolute best meals in the world. Most of her recipes she just made up as she went along. Her lasagna has always been one of her most requested meals, probably only second to her mancotti. When I was in high school, she would invite over my whole cross country team for dinner. Dinner at mama Angie's was highly attended every year and always consisted of some kind of pasta.
I love my mom's lasagna, but I also loved by grandma's lasagna. Grandma Annette's lasagna couldn't have been any different from mom's. They used different meats, sauce, techniques, cheeses. When I "grew up" and starting cooking in my own home, I decided to take a little of this and a little of that from each recipe and come up with my own.
Jamie thinks my recipe is absolutely ridiculous, because adding cottage cheese to lasagna is just blasphemy. That is a direct quote. But I LOVE my lasagna and the last time I made it I attempted to freeze it. I'll let you guys know!


Grocery List
12 Lasagna noodles
1/2 pound italian sausage(use a pound if you like more meat)
1 Jar Pasta Sauce
10 ounces of Ricotta Cheese
6 ounces large curd cottage cheese
2 cups mozzarella
Italian Seasoning
1 egg

1. Cook noodles as directed on box(careful not to tear them)
2. Ground italian sausage and pour off fat. Preheat oven to 375 F
3. Mix together ricotta, cottage cheese, 1 c. mozzarella cheese, italian sausage, egg, and seasoning in bowl
4 Lay out noodles on clean counter
5. Put couple spoon fulls of mixture on each noodle and spread across the noodle

6. Cover bottom of baking pain in sauce
7. Roll up each noodle and arrange in pan so that the loose edge is on the bottom

8. Cover noodles in remaining sauce
9. Sprinkle 1 c of mozzarella on top
10. Bake loosely covered for 15 minutes and then uncovered for 10 minutes


Some notes:
I normally cook more than 12 noodles. I always seem to tear a couple of them and it makes it much harder to put together. I always cut up the torn noodles and throw them in some butter with salt and pepper for lunch so they don't go to waste! You can switch the sausage for hamburger if you prefer. It is still very good! I use Marinara for sauce, but you can use whatever you like! You can do the layering technique as well, but I prefer to do the roll ups because it is so much easier to serve and less messy to eat.

--Katelyn

Follow Friday: Confessions of a Cookbook Queen

Hey guys! I'm back with an all new Follow Friday! This week I want to fill you in on the awesomeness that is Kristen of Confessions of a Cookbook Queen. First of all, anyone who hoards cookbooks the way I want to, is a-okay in my book. Second of all, she makes the most swoon worthy desserts that make you hungry and ready to get busy in your kitchen. I have found numerous recipes off her site that I love, as well as a whole bunch on my must try list. Like, these Brownie Batter Truffles, or these Snickers Cheesecake Fudge Brownies . I think Kate would love these Mint Chocolate Chip Brownies!

http://www.confessionsofacookbookqueen.com/


Kristan is hilarious, and honest. She is real about life with a toddler and a school age kiddo, and it's both refreshing and relatable. I LOVE checking out new blogs and if you aren't already reading hers it's definitely worth a follow. Tell me about your favorite blog!

xx

Jamie 

Perfect Portions Make Me Happy

Happy Wednesday everyone! The week is flying by and that is A-okay with me, as we're headed south to attend a wedding of an old friend, and I can't wait! Today I want to talk about Perfect Portions by Ziploc. These little bags are the most useful little things, and seem to be the most difficult things to find these days. I haven't been able to find them at any of our local stores recently and even checked at some stores in the nearest big city, still no luck!  


No worries, I just ordered some from Amazon! I have found so many uses for Perfect Portions and I'm sure there are many I haven't thought of. Our most common use for them is storing frozen boneless skinless chicken breasts. We buy large packages at the grocery store, then we trim them, cut them in half, and store them in packages of four, the perfect size for our family! Just like in the picture on the box, you can put your clean hand in the bag, pick up the chicken and invert the bag around the chicken, then I tightly wrap the bag around the chicken and stack them up in a gallon freezer bag. This makes it easy to thaw only what I need. I've used this same method on veggies, cooked shredded chicken, and ground beef. I've been making Mike bean and cheese burritos lately, and since I haven't been able to find Perfect Portions, I've had to use plastic wrap. That stuff is what nightmares are made of! If you can find, get some of these babies, they come in handy all the time! And if you can't find them in the store... There's always Amazon. Tell me what you use your Perfect Portions for! 

xx

Jamie 

Sausage Gravy and the G-Rents

Good Morning! Kate and I have been working on some fun and exciting stuff around here! We are filled to the brim with ideas and excitement. It is truly wonderful sharing a project like this with my sister and I couldn't be happier! Today I want to introduce you a little bit more to the people that have been so instrumental for both us, and who continue to be some of our biggest cheerleaders to this day.


Grandma Annette and Grandpa Stephen are two of the most amazing people you'll ever meet. They aren't your run of the mill, elderly grandparents. Until I started bringing friends around them, I didn't realize that. I thought everyone's grandparents played slow pitch softball, worked 40+ hours a week, owned rental houses that they maintain, etc. etc. My grandpa hired a stripper TWICE for my grandma's major milestone birthdays. They are anything but ordinary. And I think this is why Kate and I are the way we are. We are far from perfect, and they have always been honest with us about our shortcomings (no matter how much we disliked it) and tried their best to help us grow. Fun fact: during my teen years, my grandpa irritated me so much that I resorted to calling him by his first name only. It was a rough time. I look back and cringe. But without that honesty and his patience with me, I wouldn't be half the mama and person I am today.

Grandma has worked for KCP&L (formerly St. Joseph Light and Power) for 20+ years. Grandpa has his masters degree in counseling, but currently runs his own plumbing company and is a licensed master plumber. It's really a steal for his customers, fix your toilet and your problems at the same time! They are busier than I am and I don't know how they do all that they do. Grandma is the best gardener I've ever met (flowers only!) and Grandpa is CONSTANTLY trying to improve something. Side note, I'm going to hear about all these capitals and exclamation marks, I just know it. He'll tell me they're superfluous to my message, but I don't care! I'm a rebel, Grandpa!

We visit often and have since we were children. Because they live a few hours away, we usually make a weekend of it. Sunday mornings at The G-rents is for making breakfast and talking around the table. Grandma's sausage gravy is one of the most requested breakfasts, and I'm here to share it with you! This gravy is thick and flavorful and cooks up in no time.

Start with a pound of Jimmy Dean Country Mild sausage. Brown over medium heat.

                        
Dice a small onion and toss it in when the sausage is about half cooked.


Toss in pan and cook until sausage is browned and onions are soft.


Add 1/3 cup of flour to the sausage and stir until the sausage is coated and no flour is visible, about one minute.


Add in enough milk to mostly cover the sausage. Stir in seasoned salt.


Increase the heat to high, stirring constantly. Gravy should thicken quickly. Once it reaches desired consistency, remove from heat.


Serve over biscuits. At Grandma's, we only eat Pillsbury Grands Buttermilk Biscuits.


Sausage Gravy
1 lb. mild breakfast sausage (we're loyal to Jimmy Dean)
1 small onion, diced
1/3 cup flour
3/4 tsp. seasoned salt
milk
Brown sausage over medium heat. After about half the meat is browned, add diced onions. Continue cooking until all the sausage is browned and onions are soft. Sprinkle the flour over the sausage and stir well. Continue stir until no flour is visible and sausage is coated, about one minute. Add enough milk to mostly cover the sausage. Add in seasoned salt and increase the heat to high, stirring constantly. The gravy should come to a boil and thicken quickly. Once it reaches desired consistency, remove from heat. Serve over warm biscuits.

Get the handy printable here. Tell me what you remember your Grandma making!

xx

Jamie

Follow Fridays: The Bloggess

Jamie and I follow so many blogs between the 2 of us and love to find new blogs. I follow blogs on everything including DIY, recipes, healthy eating, personal, and ECGs. After some discussion, we thought it would be fun to start "Follow Fridays" and share some of the blogs we read on a regular basis with our readers.

One of my absolute favorite blogs is The Bloggess and I am hopeful many of you are already following her! She is absolutely hilarious and definitely not PG13. She writes about her personal life and funny little anecdotes from everyday life. She is one of my favorite people to read after a really long day. She was once a journalist/writer and started blogging to enjoy the internet life of not being censored.

This blog is for you if you enjoy sarcasm, making fun of everyday life, and like your humor a little rough around the edges.

This blog might not be for you if you are more conservative, don't like the f-word, and don't like super popular blogs.

I highly suggest checking her out!

Let us know what your favorite blogs are to follow!


-Katelyn

Coffee BBQ Sauce

Barbeque sauce (henceforth known as BBQ sauce) is a newer food to me. Until I met my husband, I never really even bothered to try it. Now I eat it on traditional BBQ foods, and burgers. Specifically, a burger with melted cheddar cheese, crispy bacon, melt in your mouth sautéed onions, a slice of tomato, and the perfect amount of BBQ sauce that makes the entire burger a big mess. I prefer a sweeter BBQ sauce because I'm a straight up wimp when it comes to spicy foods. However, this BBQ sauce isn't for me, it's for the meat loving man I married. This sauce is savory treat with a subtle heat with even subtler sweetness and it has become sauce number one for both my husband and his dad. Here is what you'll need...


Add to that picture brown sugar, my canister isn't pretty. This recipe is super simple and can be prepped easily and then left on the stove with an occasional stir. Finely dice a small onion. Brew a strong cup of coffee. Measure and add your ingredients into a small saucepan.


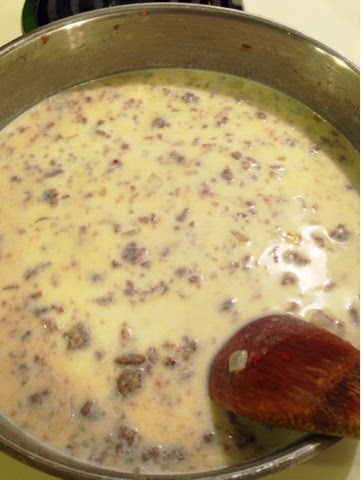
Give everything a good stir. 


Bring your sauce to a boil and then reduce to low heat. Stir occasionally. Cook until all the ingredients have cooked down and become a rich and thick sauce (approximately 45 minutes). Let the sauce cool and then store in an airtight container in the fridge. 


Coffee Barbeque Sauce
Prep: 10 minutes
Cook: 45 minutes
Makes: 2.5 cups
 
1/2 cups strong brewed coffee
1 cup ketchup
3/4 cups packed brown sugar
1/2 cups apple cider vinegar
1/2 cups finely diced yellow onion
1/2 cups sweet red chili sauce
2 heaping teaspoons finely diced garlic
2 tablespoons soy sauce (I used low sodium)
2 tablespoons ground cumin
2 tablespoons chili powder
 
Add all ingredients to small sauce pan and stir. Bring to a boil and immediately turn heat to low. Cook until thick and well blended, about 45 minutes, stirring occasionally.  Cool sauce and serve or transfer to airtight container and store in the fridge.
 
For the handy printable, click here.
 
A few notes: I'm a big fan of the diced garlic in the jar. I know some people are against it, but if it makes my life easier I'm all for it. If you do so desire, grab two cloves and chop them yourself. This recipe has been adapted from How Sweet Eats (love this blog!) which I found through the Brit + Co. app. If you love all things crafty, recipe, DIY, etc., this app is for you! I'm obsessed!
 
Thanks for stopping by! If you give this recipe a try, let me know! It makes a wonderful gift!
 
xx
 
Jamie


Delicious!: A Book Review

I am a lover of the written word, in so many different forms. Magazines, books, blogs, etc. I'd rather read my news than watch it. I don't get to read quite as much as I used to, pre-toddler days, but I still squeeze it in. It helps to keep me sane. As kids, Grandma used to take us to Hastings to pick out books every month that we came to visit, and even more often over the summer. Most people would think, as Grandma did, "they're kids! What a nice way to encourage them to read, while not spending a ton of money. Kids books are cheap!" Well... we weren't exactly your average every day kids. Ever heard of Robin Cook? He writes medical murder mystery thrillers. I had read all his books by the time I completed middle school. Michael Crichton? I wrapped up his books in the sixth grade. We were pretty young when we stopped shopping for the Boxcar Children (my favs!) and started shopping the New York Times Bestseller list. As Kate recently reminded me, I used to bargain with Grandma, as she set a number of books limit as opposed to a price limit. I'd find three books off the bargain table, which together would total the cost of one regular priced book. Those days were essential in starting our love affair with reading. Kate loves to read as much as I do, although she has even less time for fun reading than I do. My daughter currently has an extensive library and I anticipate it will only continue to grow. We read her first chapter book to her shortly after her first birthday. I think reading is so important and I hope to instill a love of books in Merideth as well.

Now to my most recent read. Last week I finished Delicious! by Ruth Reichl. I read a lot of food magazines and this book has popped up in several of them as recommended reading. It was a wonderful story with vibrant words and descriptions that transported me directly into New York City, standing on the street along with the main character. The book took a hard look at grieving and loss, and how you cope with it and carry on, without being overt about it. The main character's story was one of transformation and growth that seemed almost textbook for a novel, but had you rooting for her to be happy every step of the way. The supporting cast was full of colorful, interesting people, that accented the story perfectly. Every page made me hungry, both for food and for friendship, and even more so to delve farther into the story. I finished this book in only a few days and quickly decided it is one of the best books I've read. It delighted me, it made me tear up, and most of all, it made me feel hopeful.


If you're interested in reading it, you can find it here on Amazon, or my personal favorite, your local library. Tell me what you're reading, I'm always looking for suggestions!

xx

Jamie

Taco Seasoning

Taco seasoning is one of those versatile things you can use in a lot more than just ground beef in a fried tortilla shell. Taco soup, burritos, chicken, enchiladas, possibilities are endless. Making your own is very easy and takes no time at all. Make a big batch and keep some on hand, or package it up and hand it out as gifts!  Add a washi tape label and you're ready to go! 


What you need... 1/2 cup chili powder, 1/4 cup onion powder, 1/8 cup ground cumin, and 1 tablespoon each garlic powder, paprika, salt. Mix. Store in airtight container. Add to food until fragrant. Makes one cup.
 
If you don't need an entire cup of seasoning, and maybe just need to whip up a little for tonight's dinner... use 2 tablespoons chili powder, 1 tablespoon onion powder, 1/2 tablespoon ground cumin, and 3/4 teaspoon each garlic powder, paprika, and salt.
 
Get the printable here. Enjoy!
 
xx
 
Jamie

Sisters on Blackwell

 A message from Katelyn
Hello! In 2012, I started this blog to share my journey in crafting and baking with the rest of the world. I have been very lucky to have a huge number of views of my blog over the last couple of years, a number that is getting close to a MILLION! I was very hopeful that I would be able to keep up with the blog and post several times a months as I went through medical school, but becoming a physician is very time intensive. After looking at the dwindling number of posts over the last year, it was clear something needed to be done and the answer was almost overly obvious. I started crafting with my sister right before she got married. That was the very beginning of what would become one of my favorite hobbies and a hobby that my sister and I shared. It is with great joy that I am announcing a merger of such that comes with a few changes (as all mergers do.)

A Crafty Escape is becoming a sister's blog with a new name and a brand new look! Let me be the first person the welcome you to Sisters on Blackwell! We will expanding the blog some to include lots of new recipes, some book/beauty reviews, and of course more DIY! I hope that you will join us every Saturday morning for a new project or something new to cook up in your kitchen. We will see you soon!


A message from Jamie
I am so excited about all the changes and to be contributing regularly! Katie and I have lots of fun things to share and we'll be kicking off our new content starting on Wednesday with a review of the book I just finished. In August we'll be showing you our grandma's sausage gravy, some amazing salsa, and a fun new DIY project to spice up those boring plastic storage drawers! We've also revamped the About Me page with some fun info about ourselves and our blog so head over there to learn more about us and we'll see you back here soon! 

Skirt Fever

It has been a long time since I put my foot down on the pedal of my sewing machine. I had forgotten how great it feels to make something beginning to end and be proud of your final project, so I've decided I'm getting back into the craft room and work on some projects. My time is very limited right now with school, but I am trying to dedicate a few hours every week toward my projects to give me some "me" time and keep my sanity.
So what better way to get back to everything than making my first clothing item. The idea really came from seeing the material and trying to find something to do with it. Making my own clothes is something I've wanted to do for a long time, but was always afraid it would frustrate me. After looking at lots of tutorials and getting the general idea I came up with this skirt. It took a little trial and error, but I love how it turned out!


What You Need
1 yard patterned material
1 yard white material
Matching thread
Elastic(half waistx3inches)
Usual sewing supplies


1. Measure your waist and add 4 inches.
2.Cut a pattern piece that is your waist(+4)x 18 inches and then cut this piece in half so you have to equal pieces.(for example my pieces measure 19x18in)
3. Cut your white material waist(+4)x16 inches and cut into 2 equal parts

 4. Pin your patterns and white pieces together

5. Sew together


Waist
1. Cut a piece of your patterned material that measures half your waist x9inches and fold in half
2. Cut a piece of patterned material that is half waist+ 2-3 inches x 9 inches

3. Cut piece of elastic that is half your waist
4. Pin elastic to one half and sew at each end and a couple times in-between

5. Sew each half of waist closed
Note: in photos the elastic is small, but in retrospect the waist would have had a cleaner look if I had used one big piece of elastic rather than 2 small pieces.

Put it all together
1. Place your waist piece front down on top of front of skirt and vise versa
2. Sew together
3. Ensure the both halves of your skirt are the same length.
4. Fold bottom of the skirt up 1/2 inch and iron
5. Fold bottom up 1 1/2 inch and iron
6. Sew hem
7. Place two halves together (fronts face)and sew together using zig-zag stitch
8. Sew a straight line stitch right next to your zig zag stitch or you will see you threading when you put it on.(as shown above)

Estimated Project Time: 3 hours
Estimated Cost: $17


Contributors