

A made this "cake" as a gift for one of my best friends from high school who is marrying her high school sweetheart this coming weekend. These are really fun to make and you can be as creative as you would like in what you include as a gift and they look pretty classy too!
What You Need
Wash rags(I used roughly 6 nice ones that fit my color scheme and 20 white ones)
Hand towels(I used 4 bathroom towels and 6 simple kitchen hand towels)
Masking Tape
Round Paper Mache Container
Paint
Fabric
Glue
Candy(or whatever else you want to put into your container)
Ribbon that matches your color scheme
Random Kitchen Utensils
Tulle
1. Start by folding all your wash rags and hand towels and rolling them so that the edges are on the inside and tape with masking tape


Top Layer
1. Use 9 of your white wash rags and stand them up to make a circle. (one in the middle and 8 around)
2. Use ribbon to tie in place

Middle Layer
1. I used 4 white kitchen hand towels in the center and surrounded them by 10 wash rags. 6 were part of the color scheme and the back four were white.
2. Use ribbon to tie together.


Bottom Layer
1. You can either use a paper mache container(see directions below) as a surprise when they untie the cake or you can simply use hand towels(4).
2. Surround the paper mache container with white wash rags(takes about 10)
3. Wrap 2 kitchen hand towels around the wash rags(I tied these around together just to keep everything put together
4. Use your 4 bathroom hand towels that go with your color scheme around the front and then use 8 white wash rags around the back.
5. Tie together


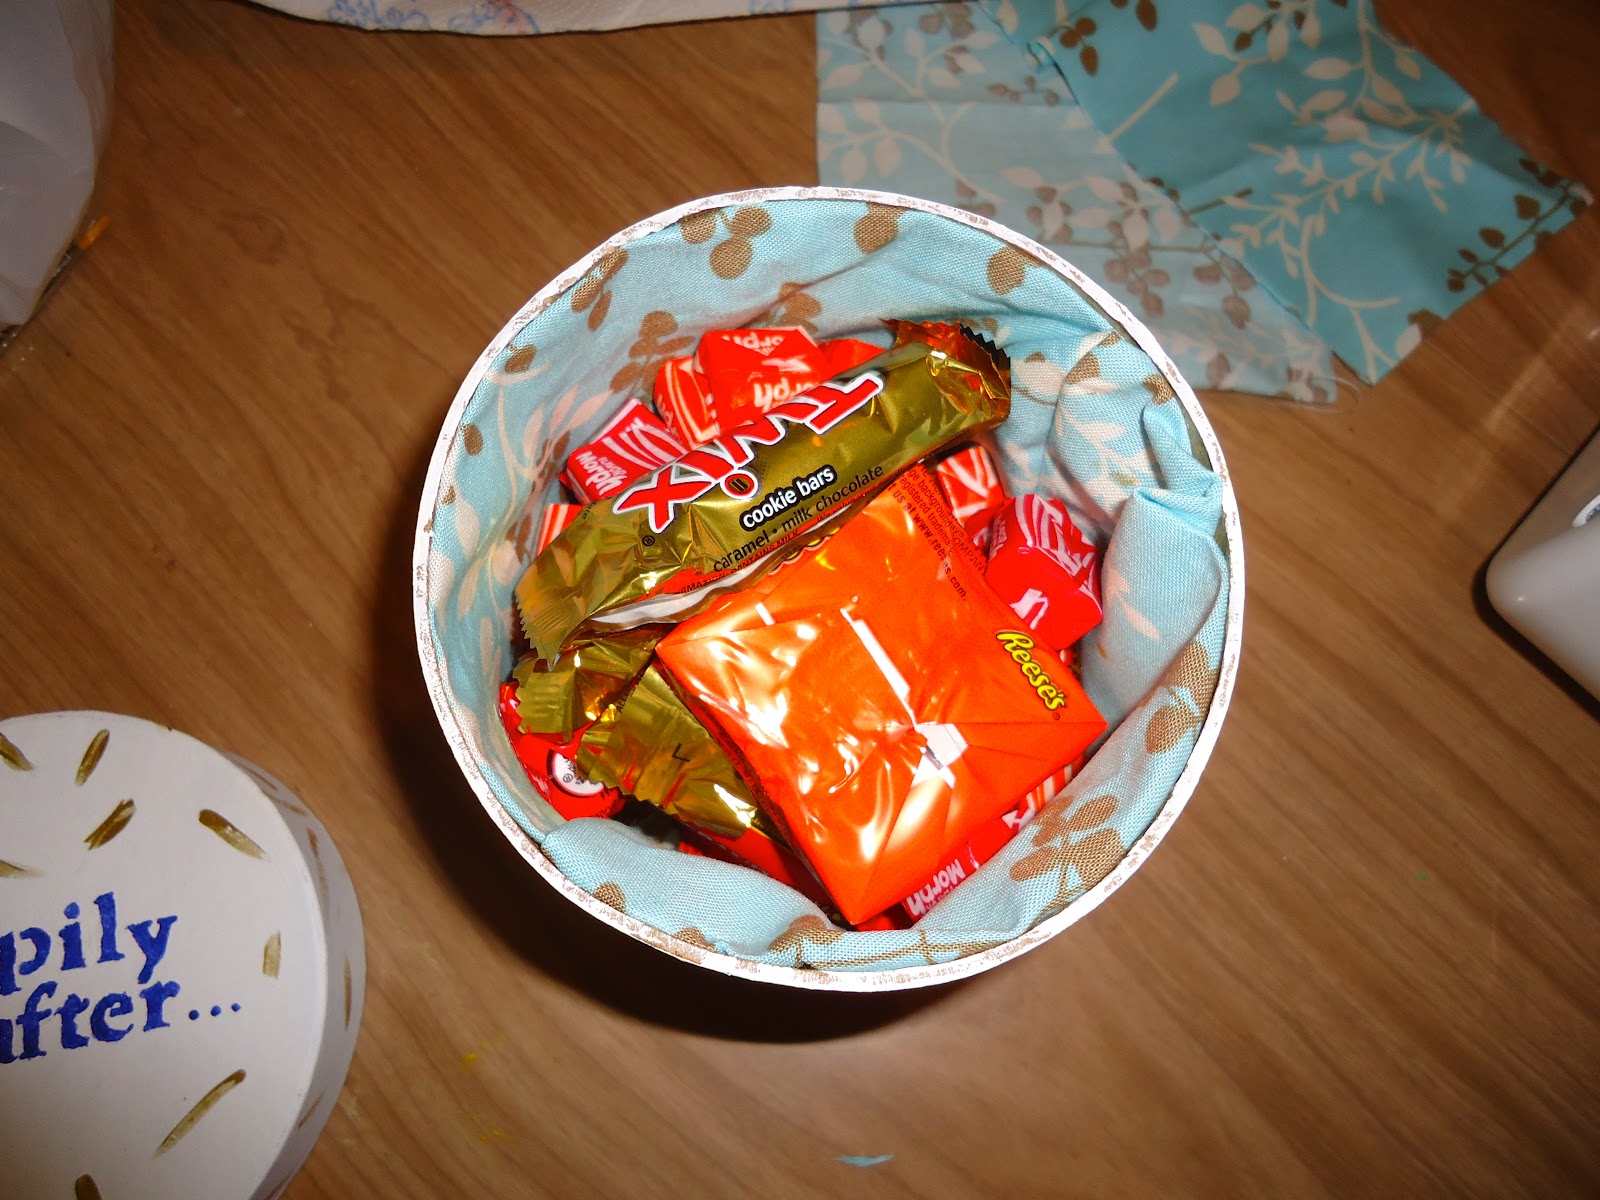
Paper Mache Container
1. Container should be about 5 inches tall and 5 inches across
2. Paint container white(will need a couple of coats)


3. Paint the name of the couple and the day they are getting married onto the container
4. Paint "Happily ever after..." onto the lid


5. Use gold paint to make small designs around the container


6. Measure out a square of fabric that is about 8 inches by 16 inches
7. Sew together the sides


8. Fold top edges over and hot glue to inside edges of the container.
9. Fill container with goodies

Attaching each layer
1. Use your ribbon to tread through top ribbon loop and down through the cake and tie.(do on back and both sides)
2. If you want extra support, after you add your kitchen utensils you can use your ribbon to tie everything together on the outside. Start by cutting two pieces of ribbon that will be long enough to run underneath your cake and all the way up to the top with some extra to tie a bow. Make an X with the middle of the ribbon and place cake on top of it so that the front of the cake is inbetween the two pieces of ribbon. Bring the four sides together at the top and tie into a big bow
Finishing Touches
1. Place different utensils into the cake in various places. You can use tulle at the top where some of the spoons can come out.
2. Place on cutting board to cardboard cake bottom

2. Place on cutting board to cardboard cake bottom

No comments:
Post a Comment